Friday, February 15, 2013

Tutorial for Brown Eyes

Hi! It took me awhile to come up with the brown eye tutorial but in the end I came up with this look. Sorry but I don't have a brown eye model so I will be doing this on myself. I really like blues, purples, and golds on brown eyes. I LOVE this tutorial and I'm kind of proud of it. On to the tutorial!
 
Starting off I applied my MAC foundation and L'Oreal Lumi foundation to my face. Next I applied my primer which is Urban Decay Primer Potion. I always apply primer or base but sometimes I forget to list it. The first eyeshadow I applied was Urban Decay's Buck into my crease and then I blended it up and out.

Next I applied Speed Blue out of the Kat Von D Beethoven palette to my lid.
 
I used a color I have never used before from my Wet n Wild Petal Pusher palette. It's the bottom color on the left side. It's a gorgeous blue purple color. I applied that in the crease and mostly focused it there. I didn't want to cover up Naked. I also applied it along the lower lashline.
 
 
Then I applied Urban Decay's Gravity into my outer v and a little into my crease.
 
To add a little more definition I applied a small amount of Lucifer from the Kat Von D palette in to my outer v. You can use whatever matte black you want.
 
 
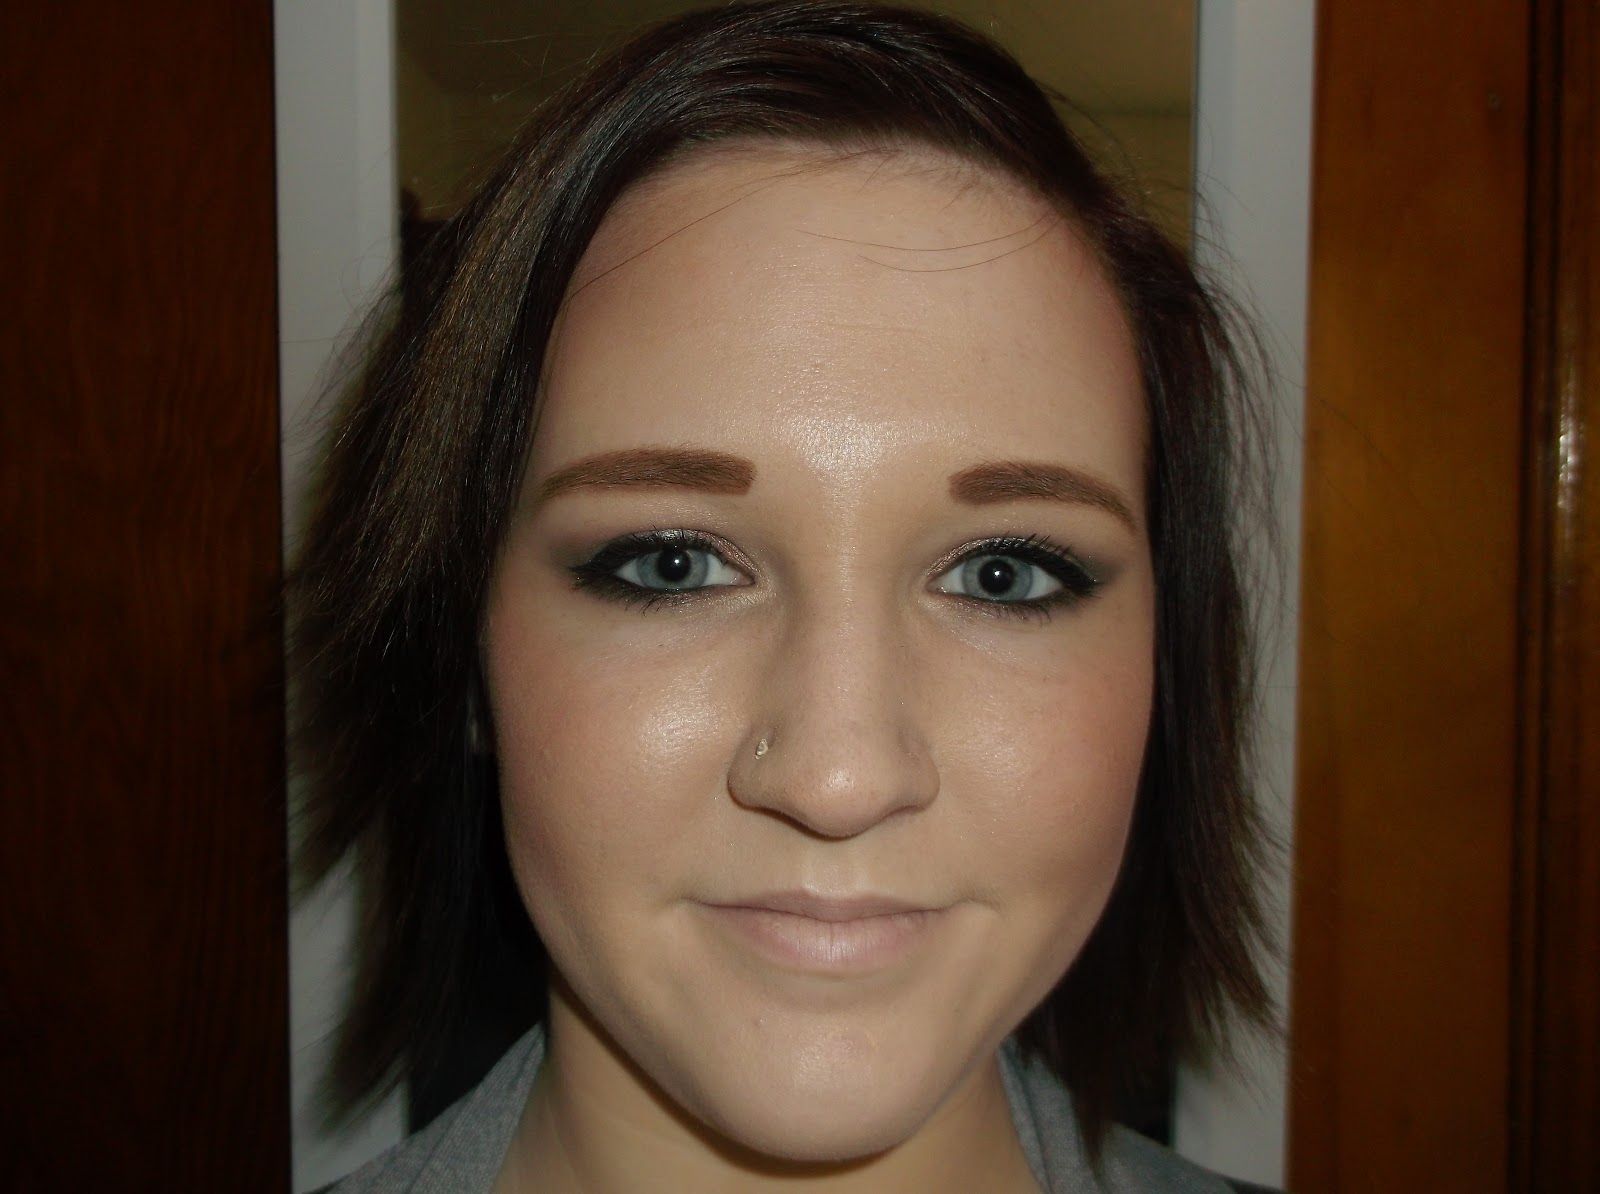
 I combined a few of the last steps. I applied my Urban Decay 24/7 Perversion eyeliner along my upper and lower lashline. I smudged it out as I almost always do. I decided to apply a matte highlight since the rest of the eyes are dramatic. I mixed the very light blue color and a skintone color (both matte) from my Coastal Scents 88 Warm palette. I applied that to my inner corners and under my browbone. (I'm not sure why the highlight under the browbone is more noticeable on one eye than the other but I didn't notice it in person.) Anyways I applied my Sephora Atomic Volume Mascara. Lastly I cleaned up under the eyes to make sure any fallout doesn't accentuate any under eye circles.


Now for the rest of my face! I kept it pretty toned down because the eyes are the stand out feature. I contoured with my elf bronzer and then applied MAC's Well Dressed blush. Lastly I applied MAC's Creme Cup lipstick. I guess that's it but I feel like I'm forgetting something.


I hope you guys like this tutorial. It's super pretty. One eye color left and the one I've been working through in my head a lot. By the way this tutorial was kind of a pain because I had to do it with my glasses on instead of my contacts. I wasn't too happy about this...
 Anyways thank you for reading and I'll have the next tutorial up sometime soon!

update(:

Hi! I decided to update you guys on what I have coming up. Tonight I'm hoping to post the tutorial for either brown or hazel eyes now that the Valentine's tutorials are done with. I'll have some reviews up either tonight or in the next week. I'll have a haul up on Sunday. I should also have an outfit of the day up on Sunday too. Right now I don't have a plan for any tutorials besides the eye color ones. I have to start thinking of some ideas or maybe just playing around with my makeup and hopefully coming up with something creative and fun. I do have some eyeshadows I would really like to use for a tutorial. That's all I have planned for right now. I'm sorry if things get hectic and I don't post as often. I hope everyone had a great Valentine's Day. I did even though I'm like the Grinch of Valentine's Day. Anyways I'll post something again later. Hope your having a good day and thanks for reading!

Wednesday, February 13, 2013

First Impressions: Tarte Clean Slate Deluxe Primer Trio


Hi! Sorry I haven't posted anything in awhile. I've been super busy trying to get this job. Also it's my friends birthday on Valentine's Day and we are going out this weekend so I had all that to look forward to. Anyways I'm just going to do a first impressions post because so far I am amazed and love this product. I bought a few things at Sephora the other day. I mostly wanted mascara and I noticed Sephora has one on sale for $5 so I bought that. I was also going through my shopping list/wish list and noticed I had the Tarte Clean Slate Deluxe Primer Trio on my list and it was $9. I was kind of on the hunt for a primer that would work for me with my large pores and this kit included that. So this is what it looks like:
 
The primers are a little smaller then what I was hoping. Today I tried out the first purple one which is for large pores. It also claims to last 12hrs. I decided to try the eye primer too. When I first applied the primer I already noticed a difference in my pores. It's very lightweight and a small amount goes a very long way. After I applied my foundation my face looked flawless. Super happy with it so far. Right now it has been 11 hrs and my face looks really good. My foundation isn't as perfect as when I applied it but it's a LOT better than it usually is. Also my face is normally pretty oily. Right now my face looks like how to usually does after 3 hrs without primer. A very small amount of shine that could be mistaken more as a glowy foundation. Another huge plus that it keeps shine away for that long.  I didn't set with a powder or anything because I wanted to really test this primer. I image if I had set it the results would be even better. I would definitely buy it again and I'm considering it. The full size one is 1 oz. and costs $30 which I feel is pretty much the usual for primers. I have tried the Benefit Porefessional and I think this one is better because I get a better matte finish with it and this makes my makeup last longer. Now on to the eye primer! The primer is a little more liquid-y than I'm used to (I normally use Urban Decay Primer Potion.) It being more liquid-y ended up being a plus because you need such a small amount to cover your entire lid. I decided to use my Coastal Scents 88 Warm Palette because these eye shadows don't last that long on me with primer or a base. First thing I noticed was this primer really grabs your eyeshadow and holds. It can be a bit hard to blend at times because of that. However it was only a slight negative. This primer has the same promises of lasting 12hrs. My eye makeup looks FLAWLESS!!! I cannot emphasize that enough. It does not look any different then when I applied it this morning. I'm sooooooooooooo happy with this primer. So much so that I may even get this instead of my Urban Decay Primer Potion (I'm a huge Urban Decay fan). The full size is 0.39oz and it costs $22. I really love this primer and can't image what I'm going to do when I run out (just kidding...sort of). Tomorrow I'm going to try the brightening primer that comes with the set. I'm hoping I'll like that one just as much as I love the first two. Anyways I hope you guys enjoyed this first impressions post. I should have a haul post coming up soon. Thank you for reading!(:

UPDATE: First impressions of the other primer. This one was brightening and I wasn't positive what this was suppose to do. I mean it says brighten but was it going to be luminous or matte. How was it going to brighten? That was my main question. I didn't see the same immediate results that I did with the poreless primer. After I put my makeup on it was a HUGE difference though. My skin looked radiant and glowy. While this is a beautiful primer I'm not a huge fan of it for my oily skin. I still like it but I will probably only use it when I feel like my skin needs a little bit of a pick me up. Overall these primers are AMAZING!!! I planned on picking up the full size versions today but my Sephora was sold out besides the brightening one. I will eventually get them. But I highly recommend trying them!

Saturday, February 9, 2013

Valentine's Day Look #2

Hi! This is my second look for Valentine's Day. Its more neutral and naturally sexy. This will probably be my look for Valentine's Day. I want to be glowy and pretty. I used a lot of makeup I haven't used in awhile. So here is the tutorial I came up with:
 
I started off applying my MAC foundation and my Lumi Foundation. I applied Urban Decay Primer Potion. Then I applied a mix of Urban Decay Naked and Buck into my crease and really blended it up and out.

 
Next I applied Stila Kitten on my lid.

 
Then I took Bare Minerals Loose Eyeshadow in Cocoa Bean and put it into my crease and outer v.
 
I combined a few steps in this next picture. I applied NYX Jumbo Pencil in Milk under my brow bone and my inner corner. Then I applied Stila Kitten into my inner corner and MAC Glamour Light under my brow bone. Then I applied Cocoa Bean on my lower lashline. I also applied Urban Decay's Half Baked as a blending color between Kitten and Cocoa Bean. I also applied a little bit on my lower lashline.
 
Next I applied Urban Decay's 24/7 Liquid Liner in Perversion. A little trick when applying liquid eyeliner, a magnified mirror will help you get it very precise line. I applied the regular Perversion eyeliner to my both my upper and lower waterline. Then I curled my eyelashes and applied my mascara. I will probably wear false lashes on Valentine's Day. The eyes are done and on to the rest of the makeup.
 
Again I combined a few steps. Fill in your eyebrows if you need to. I applied concealer under my eyes to brighten it up. Then I applied my elf bronzer and did my usual contouring under my cheek bones and around my hairline on my forehead. Then I applied Smashbox Loose Shimmer in Burlesque on top of my cheek bones and cupids bow. After that I applied my elf blush. Then to add some body shimmer I took my Urban Decay Marshmallow powder and applied that to my neck, shoulder, and anywhere you want. Last few steps I applied MAC Angel lipstick and then I applied a double ended lip gloss by Smashbox in Peep Show. I'm not which one is suppose to be peep and which one is suppose to be show but I used the lighter pink of the two. Lastly set with powder and makeup setting spray. All done and ready for Valentine's Day!


Don't mind my bangs in the last pictures. They were being a pain. I wish you guys could see the makeup in person because it is so much prettier. Anyways I hope you guys enjoyed this tutorial. I hope you guys have a great Valentine's Day taken, single, or whatever! Thanks for reading(:

Wednesday, February 6, 2013

Valentine's Day Look #1

Hi! So this is the more bold look of the two looks I'm doing. I wanted to do a bold eye and lip. Plus the bright pink lip makes me think of Valentine's Day. On to the tutorial:
 
First I applied my L'Oreal Lumi foundation to my face. By the way I always use my Makeup Geek Deluxe Stippling Brush to apply my foundation. Then I apply my NYX Jumbo Pencil in Milk all over my lid. I apply Urban Decay Mushroom to 2/3 of my lid.

It looks a little weird right now. Next I apply Urban Decay's Naked into my crease and I blended it up.
 
I applied Urban Decay Perversion eyeliner along my upper lashline and then smudged it.
 
I applied Urban Decay's Asphalt into my crease and outer v.
 
I applied a small amount of Urban Decay's Blackout into my outer v to add more dimension. I also applied a matte highlight color from my 88 palette under my brow bone. I applied a Urban Decay's Sin to my inner 1/3 and inner corner.
 
Then I lined my upper and lower waterline with Perversion and applied my mascara. The eyes are done!

 
Next I apply my MAC Viva Glam Nicki Minaj Lipstick. It's super bright pink so to tone it down a little and add some shine I apply Urban Decay's Lip Junkie in Naked. This is the finally result!


And a pic with my glasses(:
 
I hope you guys liked this tutorial! I really like it. I'm working on the second Valentine's Day tutorial. I have an idea of how I want it to look but I don't know what shadows I want to use exactly. Anyways tomorrow I have a promising job interview. I probably won't post anything tomorrow because I'll be busy with that. But I bought 2 things at Sephora tonight that I'll have to review. I bought a tarte set that has 3 primers and I also bought a mascara. Anyways more tutorials and reviews coming up. Thanks for reading!


Monday, February 4, 2013

L'Oreal Infallible Eyeshadow Tutorial/ Review

Hi! Today I'm reviewing the L'Oreal Infallible Eyeshadow in Midnight Blue. There will be a tutorial at the end. First things first here is a picture of the packaging:
 
When you open it up you will see this little grey thing on top of the shadow. Do NOT throw it away! I have heard rumors if you do the shadow dries up and is pretty much useless. Anyways I am a huge sucker for eyeshadows that feel smooth and almost creamy feeling. Urban Decay is is amazingly smooth and this is just as smooth if not more. They are very pigmented too and at a great price. I believe I paid around $5-6 for one. They have great staying power. It's been 10 hrs and makeup still looks great. I love the shades they have but I really want to try a neutral color and those are always sold out. I believe I will probably get the emerald and the garnet one next. I think they have a pretty good shade range but I wish they would add more lighter shades. I think most of the shades are dark and only a few are a light. Honestly I can't think of a con for these. I definitely would buy these again. I'm planning on buying some more shades of these. So I guess on to the tutorial!

So to start things off I applied my MAC foundation and my L'Oreal Lumi Foundation. Then I applied Urban Decay's Bootycall all over my lid.

Then I applied Urban Decay's Naked into my crease to add some depth.

I applied Urban Decay's Binge 24/7 Eyeliner to my upper and lower lashline.

Next I applied L'Oreal Infallible Eyeshadow in Midnight Blue over the eyeliner and worked it into the crease and outer v.

Next I applied a light color out of my Coastal Scents 88 Warm palette to my inner corner and under my brown bone. Also applied two coats of mascara and we are done with the eyes!
 
For the rest of my face I applied MAC's Well Dressed blush and MAC Hue lipstick.

 
Anyways I hope you guys enjoyed this quick tutorial. I also took a small amount of a lighter blue color from my warm palette to add a little more blending between Bootycall and Midnight Blue. It didn't make that much of a difference and I added it at the last minute. Tomorrow I will hopefully have a Valentine's Day tutorial up. Anyways I hope you guys enjoyed this quick review and tutorial!

Sunday, February 3, 2013

Outfit Of The Day: Bowling

Hi! I thought I'd do a quick outfit of the day. It's actually from yesterday but since we stayed out afterwards it took me awhile to getting around to uploading it today. Anyways just going out and having some fun bowling for the night. Here is what I wore:


Top is from Forever 21
Cami is from Forever 21
Jeans are from American Eagle
Necklace From Forever 21
Shoes (which you can't see) are from Payless Shoes and they are leopard print moccasins
For my makeup I just played around with my new Coastal Scents 88 Warm Palette. My face is Revlon Colorstay in Ivory that I just needed to use up. On my cheeks is MAC Breath Of Plum blush. Maybe I'll do a tutorial? Not sure right now. It was a lot of fun bowling though. I'm a horrible bowler though. I think my highest score was 76. We had some drinks at the bar afterwards and my friend is the bar tender so she mixed me up some drinks she came up with. Of course they were super good. I do regret looking at this picture how I did my hair. Well I can't totally say that. Earlier in the evening I was playing around with makeup and my hair looked ok. Then I decided it was too flat and I should have just left it. Here is how it started out:
It wasn't as flipped out and it looked more piecey. Sorry about not having a picture of the shoes. My fiancee wasn't in the mood to take pictures for me. I wanted something I could slip off quick and get the bowling shoes on. And it was super cold so nice warm moccasins was definitely a must. My shirt I really like and I love wearing it with my burgundy skin jeans from my new year's eve outfit. It is a hi-lo hem which I didn't really get in the pictures either. Anyways I hope you guys enjoyed my quick outfit of the day. Tomorrow it will either be another outfit of the day or a tutorial. Thank you for reading and have a good day!